Upholstery Webbing Rustic Utensil Holders Tutorial:
Spring is here, and that means it's time for some
wonderful meals Al Fresco! We love to dine
outdoor, whether for breakfast, a crisp salad
on a hot summer day, or a nice dinner in the warm
summer nights, outdoor dining is one of our
family's favorite ways to enjoy the the warm weather. There is
something rustic and natural about dining outdoors.
My daughter and I went to the fabric store this weekend
to get fabric to make our sewing machine covers (post coming soon),and I can never seem to pass the burlap and webbing isle without stopping and picking up a few things. I love all things
rustic, so I picked up some upholstery webbing for only a few cents a yard, and what did I decide to make... Rustic Utensil Holders of course!
Here is a simple 5 step tutorial for my Rustic
Upholstery Webbing Utensil Holders:
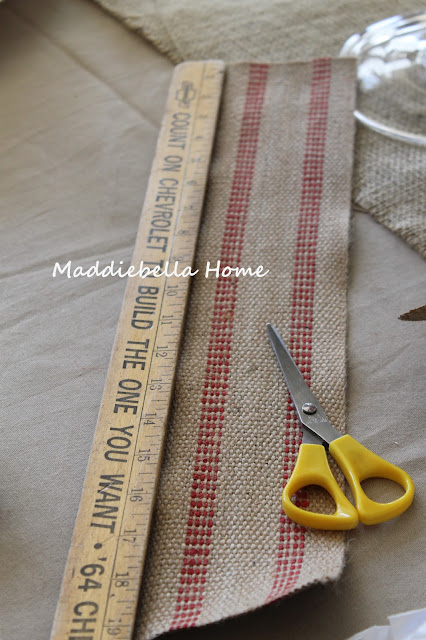
Step 1: I used 3 yards of Upholstery Webbing-
Step 2: I measured and cut the fabric
Step 3:
I brought the webbing mid way up, and then folded it downward creating a 3' inch flap. I used my utensils as a guide to where
I wanted the slit/opening of the holder to be.
Step 4:
I sewed the flap closed on all three sides,
being careful not to sew the top of the flap shut.
Step 5:
I then sewed the rest of the holder shut along the sides,
to create the "pocket" for holding the utensils.
And here are my rustic
upholstery webbing utensil holders.
Just in time to enjoy spring and summer outdoor dining!
So the next time you visit your local fabric store, don't overlook the trim isle. Who knew that a simple strip of furniture webbing at .79 cents a yard would make the perfect Rustic Utensil Holders?!
Hugs,
Betty
Sharing at:


Too cute. I have to try it!
ReplyDeleteSuch a great idea....Going to have to mark this for future use! I sometimes come across burlap webbing in my shopping excursions...Thanks for sharing it!
ReplyDeleteThey are so cute! I have a big roll of webbing, only problem is knowing where it is :) I would love to do this!
ReplyDeleteOMG this is the cutest! So glad I found you. I'm your newest follower ;) I would love for you to link this up to our new linky party, Give Me The Goods Monday! I am hosting with 4 other bloggers, 1 party but your links will show up on all 5 blogs!
ReplyDeletehttp://www.somuchbetterwithage.com/2013/04/give-me-goods-party-3.html
Jamie @ somuchbetterwithage.com
I love these! They would work so well in my home :D
ReplyDeleteIf you get a chance, please link up to my party: http://suburbsmama.blogspot.com/2013/04/sunday-linky-party-2.html
Super cute... I love them!!
ReplyDeleteSo pretty and perfect for Spring! Love them and the burlap on the wine bucket! Coming over from French Country Cottage.
ReplyDeleteJeanine
Love this idea! Great for summertime dining.
ReplyDeleteMary Alice
They are beautiful and great tutorial!! I would love for you to link up at SHOW-licious Craft Showcase.
ReplyDeleteJust follow the link....http://sew-licious.blogspot.com/2013/04/show-licious-craft-showcase-26.html.
Marti
What a great idea!!! Thanks for sharing it.Next time i go to a fabric store I will certainly look at the trim isle.
ReplyDeleteLovely idea just seen on an inkle-weaving discussion list. Thank you!
ReplyDelete